Showing posts with label scrapstreet. Show all posts
Sunday, December 09, 2012
Scrapstreet Magazine's 100th Final Issue
Well its been over a year since I started writing for Scrapstreet magazine and I want to thank Dora and the Scrapstreet team for that opportunity. The 100th and final issue of ScrapStreet magazine is here after 7 years. I gotta say I am going to miss it. The magazine was loaded with ideas and inspiration.
So as I hang my hat as a scrapstreet writer, I want to make sure you go on over to Scraptreet because they have alot of digital giveaways.
Thank you Scrapstreet for inviting me to be a part of a great group of people, and a very inspirational magazine.
Monday, October 01, 2012
Fall Issue of Scrapstreet Magazine out today
Tuesday, August 28, 2012
Using Your Left Over Stash
I have a post up at Scrapstreet today, go check it out! I talk about utilizing your stash and I give you 3 steps I usually take when making a mini album.
1. Match Theme
2. Use Base Color throughout Album
3. Choose 2-3 colors besides base color only
I made this Halloween mini using my stash from several collections, some are:
Trinity Paper Arts
My Little Yellow Bicycle
My Minds Eye
May Arts
Prima
1. Match Theme
2. Use Base Color throughout Album
3. Choose 2-3 colors besides base color only
I made this Halloween mini using my stash from several collections, some are:
Trinity Paper Arts
My Little Yellow Bicycle
My Minds Eye
May Arts
Prima
Thank you for stopping by and check out my post on Scrapstreet! Happy Scrapping
Monday, August 20, 2012
Want to be published?
I am looking for guest designers! You could be published!
Contact me at veronica@scrapstreet.com if you are interested in becoming a future guest designer for my journaling article in ScrapStreet.com Magazine.
Fall 2012 Calls
Please send a separate email for each submission you would like to be considered for publication. Please keep the image size around 600 x 600 pixels. Thank you!
Thursday, August 09, 2012
Out to Sea with Trinity Paper Arts
Well summer is almost gone though you wouldn't guess that if you lived in S. Florida. We are still getting lots of sunshine and beach time.
Today I would like to share with you a beach tag I did for my post over at Scrap Street e-zine. There is always something going on over there with lots of inspiration and tutorials.
For this tag I used lots of Helmar Adhesives. I also used my favorite beach paper from Trinity Paper Arts; Surf N Swim.
Enjoy the rest of your sunny summer days! Happy Scrapping!
Today I would like to share with you a beach tag I did for my post over at Scrap Street e-zine. There is always something going on over there with lots of inspiration and tutorials.
For this tag I used lots of Helmar Adhesives. I also used my favorite beach paper from Trinity Paper Arts; Surf N Swim.
The 450 Quick Dry is
also great for adhering netting or mesh because it spreads thin, and dries
clear. You also get some lead time to adjust your elements before it dries.
Once the glue dries it adheres forever!
Enjoy the rest of your sunny summer days! Happy Scrapping!
Product Used:
Helmar 450 Quick Dry
Helmar Quick-fix adhesive runner
Trinity Paper Arts Surf N Swim:
Noteworthy B
Stripes A
Borders A
Borders B
Beach Day A
Decor Stickers
Friday, June 29, 2012
Welcome "Home" Mini Chipboard Album
I have been in a very bright and cheery mood lately - the last 3 albums I've made are all cutesy! Today I want to share this adorable little 6x6 chipboard album. This album is colorful and whimsical and it makes me happy! This little album is also being featured over at Scrap Street today, so go check out the articles. Scrap Street always has great ideas from all the ladies.
I drew and hand paper pieced a cute "home" on the front cover with a little "welcome" sign on the door. Notice all of the detail in the little house, from the hand cut slat walls to the tiny curtains in the window and stone work on the chimney.
I used the Heidi Grace's "One Sunny Day" collection manufactured by Colorbok. Heidi has a whimsical style that I have admired for a long time; and this collection inspired me to make this cute 6x6 mini. The album is made of chipboard and it has 12 pages counting the front and back covers.
I have listed this cute Mini at my Etsy Store - Kitsnbitscraps - so if you like it and want this one of a kind mini - go to my store and check it out.
I drew and hand paper pieced a cute "home" on the front cover with a little "welcome" sign on the door. Notice all of the detail in the little house, from the hand cut slat walls to the tiny curtains in the window and stone work on the chimney.
I used the Heidi Grace's "One Sunny Day" collection manufactured by Colorbok. Heidi has a whimsical style that I have admired for a long time; and this collection inspired me to make this cute 6x6 mini. The album is made of chipboard and it has 12 pages counting the front and back covers.
I have listed this cute Mini at my Etsy Store - Kitsnbitscraps - so if you like it and want this one of a kind mini - go to my store and check it out.
Hope you likey and dont forget to check out my etsy store KitsnbitScraps. Happy Scrapping
Friday, January 20, 2012
Scrapstreet EZine Spring 2012 Call
Do you want to get published at Scrapstreet? I am having a call for Spring. Make a card, layout, or altered (album) item with a "Timeless" theme and send it in.
Here is the call:
"Timeless. It’s a new year, where has the time gone? Get out your clocks,
time pieces, and clock images to create a timeless layout, album or card.
Take back some time by remembering the past with a time inspired theme."
Here is the call:
"Timeless. It’s a new year, where has the time gone? Get out your clocks,
time pieces, and clock images to create a timeless layout, album or card.
Take back some time by remembering the past with a time inspired theme."
Deadline is midnight February 18th for all calls.
Please send your work to submissions@scrapstreet.com.
Please send a separate email for each submission you would like
to be
considered for publication. Please keep the image size around 600 x 600
pixels.
considered for publication. Please keep the image size around 600 x 600
pixels.
Check out more call at Scrapstreet
Thank you!
Sunday, January 15, 2012
7 Gypsies Photo Tray and Monthly Kit
Altered items make great gifts. I made this photo tray for my niece, who is all grown up now. I thought it would be nice for her to have a picture of her and her mom (my sister) when she was only 9 months old.
I used the Paper Niche Monthly design team kit for January. It is full of paper and embellishments. The 7 Gypsies 4x6 Photo Tray was not included in the kit, but I’ve wanted to make a photo tray for a long time and thought it would make a great birthday gift for my niece.
I used mostly the Glitz Girls “Vintage Blue” collection which was included in my kit as my back ground 4x6 matts. Then I added the peek-a-boos transparencies to give my background an easy and pretty extra layer and pattern. I then used the October Afternoon Farmhouse “clothesline”paper and cut out the flags, and added pretty ribbon to string along the front of the tray.
| The journaling card is from Prima and the background from Glitz Designs. The flowers are prima also. The key was given to me at CHA but can't remember what booth. |
Sunday, January 01, 2012
Weave It
The new January edition of Scrapstreet is out!
If you haven't read this magazine yet, make it your New Years favorite. This mag is loaded with lots of examples, fun articles and a Free Digi kit!
I wrote an article on revising the old (but still cool) technique of weaving. Go here to read my article and see all the submissions using this technique. WEAVE IT
This is the example I made for my article using the weaving. It's my fresh new idea book for 2012!

If you haven't read this magazine yet, make it your New Years favorite. This mag is loaded with lots of examples, fun articles and a Free Digi kit!
I wrote an article on revising the old (but still cool) technique of weaving. Go here to read my article and see all the submissions using this technique. WEAVE IT
This is the example I made for my article using the weaving. It's my fresh new idea book for 2012!
Idea Journal by Veronica Johnson
Supplies: Paper: Webster’s Pages, BasicGrey, Cardstock: Bazzill Basics Paper, Ribbon: May Arts, Buttons: Webster’s Pages, Alphabet: American Crafts, Jillibean, Chipboard: Jenni Bowlin, Tape: 7 Gypsies, Leaves: Zva Creative, Wood Spool: Maya Road, Other: canvas, metal clip, eyelets, netting, yarn, crystals. Tools: Stamps: Inkadinkado, Other: sewing machine.
Design Notes: I wove several different elements together to give the journal a “want to touch” it feeling. This is my inspiration journal; therefore I wanted to make sure the surface portrayed my personality. It’s a little bit of everything.
Journaling: My Scrapiness.
Hope you enjoy my article and the Scrapstreet mag. Happy Scrappin in 2012!
Thursday, December 29, 2011
Mixed Media Canvas
Now that we are heading toward the New Year, my mind goes directly to my
resolutions. One of my resolutions is to clean up, simplify and make my scrap
room pretty. I think I get more creative when my surroundings are pleasant and
clean. So how about a little wall art?
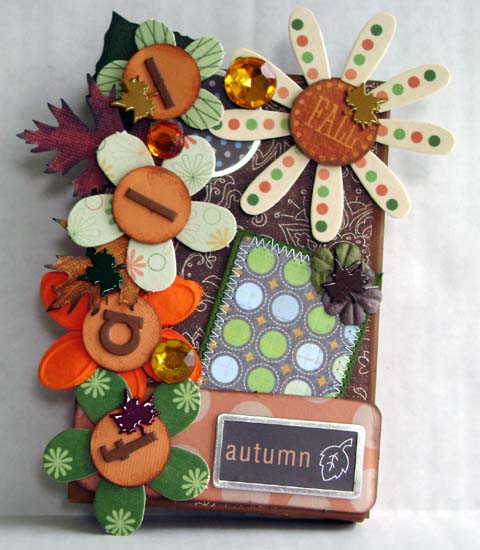
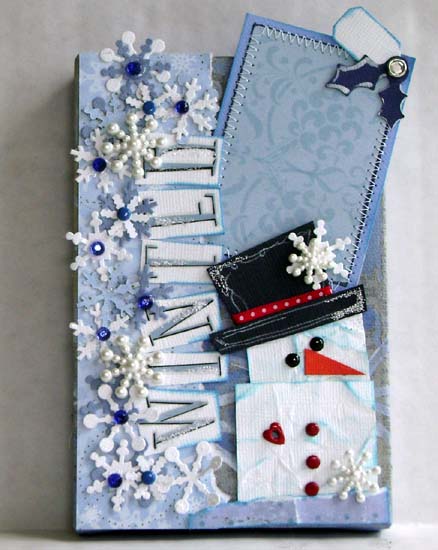
I made these four "seasonal" 4x6 canvas art and left room for litle wallet size photos. I will line them up on my wall and not only have something I made to look at but also photos that I cherish.
I have Spring,
Summer Fall and Winter. I used the Blick Studio stretched canvas on a 4x6 wood
frame. I first painted the canvas then I started layering stencils, paper, foam
stamps, and rubons.
I made these little
tags to mount my photos and I matched them to the canvas.
These dont take a lot
of time because they are 4x6, and you can make them any theme you want. For
instance how about, Peace, Love, Happiness, and Art? That is my wish for the
New Year.
Saturday, November 12, 2011
Thanksgiving Layout and MyLYB
It’s November, fall is in the air and Thanksgiving is around
the corner. Even though I live in S.
Florida, which means, I do not see the foliage change colors; I still can feel
the season changing. For me it is not
too early to start thinking about my Thanksgiving layout.
One of my favorite paper companies and the collection that I
am using this year is the Hello Fall collection by My Little Yellow Bicycle. I usually go back and forth between vintage
and cutesy, but for this thanksgiving layout it’s MLYB for me!
I thought the colors of this collection would be perfect for
my thanksgiving photos. The entire
collection gives me that warm, cozy, homemade feeling. As you can see by my layout below, I added
some family homemade favorites. Yep,
pumpkin pie, and a side dish with yams, cinnamon and brown sugar. The pumpkin
pie is my daughter’s favorite. My nephew and hubby go for the turkey. I personally like the yam side dish best.
This is an easy and quick layout to make. I decided to play
catch-up and used some photos from the past.
But now that I am in the mood, I am going to make another layout and get
ready for my Thanksgiving Day photo shoot. Why don’t you do the same, and get a head
start on your layout before you have your Thanksgiving photo shoot!
Supply List from My Little Yellow Bicycle:
·
Stick leaf pins
·
Canvas border stickers
·
5 things envelope package
·
Journaling cards
·
Chipboard package
·
Paper flower pack
·
Walnut Knit paper
·
Happy Fall paper
·
Harvest Ring paper
·
Bazzill Basics Paper – 1 each 12x12 Nutmeg and
Apricot
Instructions:
Nutmeg cardstock base paper 12x12
Cut Walnut Knit paper 11x11center on base 12x12
Cut strip from Happy Fall 1.5 x 12 and adhere approx 1 inch
from left
Cut Harvest ring paper 8.5 x 8.5
Matte your photos
with Apricot cardstock
Happy Thanksgiving
Wednesday, October 19, 2011
Using 3D Elements
I love making all kinds of mini albums. I personally like to make the cover first
because that helps me set the premise for creating the rest of the pages
inside. I also want to make sure that my
album cover gets your attention from the first moment you see it.
One of the ways that I initiate interest on my album covers
is by using 3D elements whenever possible; and using a wood piece is an
excellent way to decorate an album cover and catch your attention.
Wood pieces come in different patterns, below are four
albums I have made with 4 different themes.
The covers or introduction to the album speaks for itself. There is no mistaking what the theme of the
album will be by the wood piece that is shown on the cover.
Next time you are contemplating making an album, think about
your theme first - and then go shopping for a cute 3D wood piece. You will be amazed at how many choices you
have. Oh, as an added tip, when adhering
your wood piece to your cover be sure to use a strong liquid glue such as
Beacon’s fabri-tac or zip-dry. These
adhesives dry fast and clear. Happy
Scrapping!
Monday, October 03, 2011
Scrapstreet Oct Issue is revealed
I am so excited about this issue because it has my first published article!!
If you have not subscribed to this awesome e-mag you must go check out - its loaded with lots of inspiration and tips.
See the rest of the new staff writers and their work and check out my article!!
Wednesday, September 28, 2011
The Art of Paper Piecing
My favorite things to create are mini albums, but once in awhile I get in the mood to make a cutesy page. I also have a grown daughter but I still have some “catching up” to do on her childhood photos.So what better way to make a cutesy (child themed) layout than to use some paper piecings.
With this owl, I “textured” its head and wings by running them through a cuttlebug embossing folder. Then I made the feathers by punching out several rows of a fiskars border punch and “layering” them one on top of the other.
I get my ideas for paper piecings in several ways.I buy coloring books, I go card browsing at my local card shop and I also get ideas from cartoons.There are also websites that will sell you a paper piecing pattern in an svg file to load onto your computer for your cutting machine. You can also get a light box, especially if you are using a cute image from a coloring book. I personally prefer to make my own paper piecings - so I draw them.
All you have to remember when making paper piecings is to“pull apart” your image.For instance when I drew this bear (got the idea from a card I saw), I first drew my bear, then I copied the image on the Xerox several times. Then I cut the image apart by first cutting out the head, then I cut out the muzzle, then the nose, then arms, etc. I did the same thing with the bunny head.
Here are some other paper piecings that I have drawn.All my drawings are very simple, but that is all it takes.Remember It’s all in the details, by layering, inking and embellishing your paper pieces - you can give them character.
With this owl, I “textured” its head and wings by running them through a cuttlebug embossing folder. Then I made the feathers by punching out several rows of a fiskars border punch and “layering” them one on top of the other.
My next paper piecing is this mermaid I originally made for an underwater layout class I taught.My thought was that it would be cute for a little girl’s pool party or for a Halloween “little mermaid” costume layout.
With this mermaid, I “layered” her hair, and then I made her scales by layering circles in rows.
Then to give the mermaid that "wow", I added lots of bling.
So next time you are stuck for an idea for a layout - go buy a coloring book and get some ideas for a paper piecing layout. Enjoy.
Friday, September 23, 2011
Take Something Old and Refresh It
The Holidays are just around the corner, so why not get an
early start? You can begin by making
some embellishments for Halloween since there are only a couple of days left in
September. I started rummaging through
my box of Halloween embellishments (I organize by theme) and saw these two
“VERY OLD” die cuts. I don’t even
remember where I got them, that’s how old they are. But, I love a challenge, so I went from this:
To this by “refreshing” my old die cuts by inking,
adding cutesy brads and ribbon.
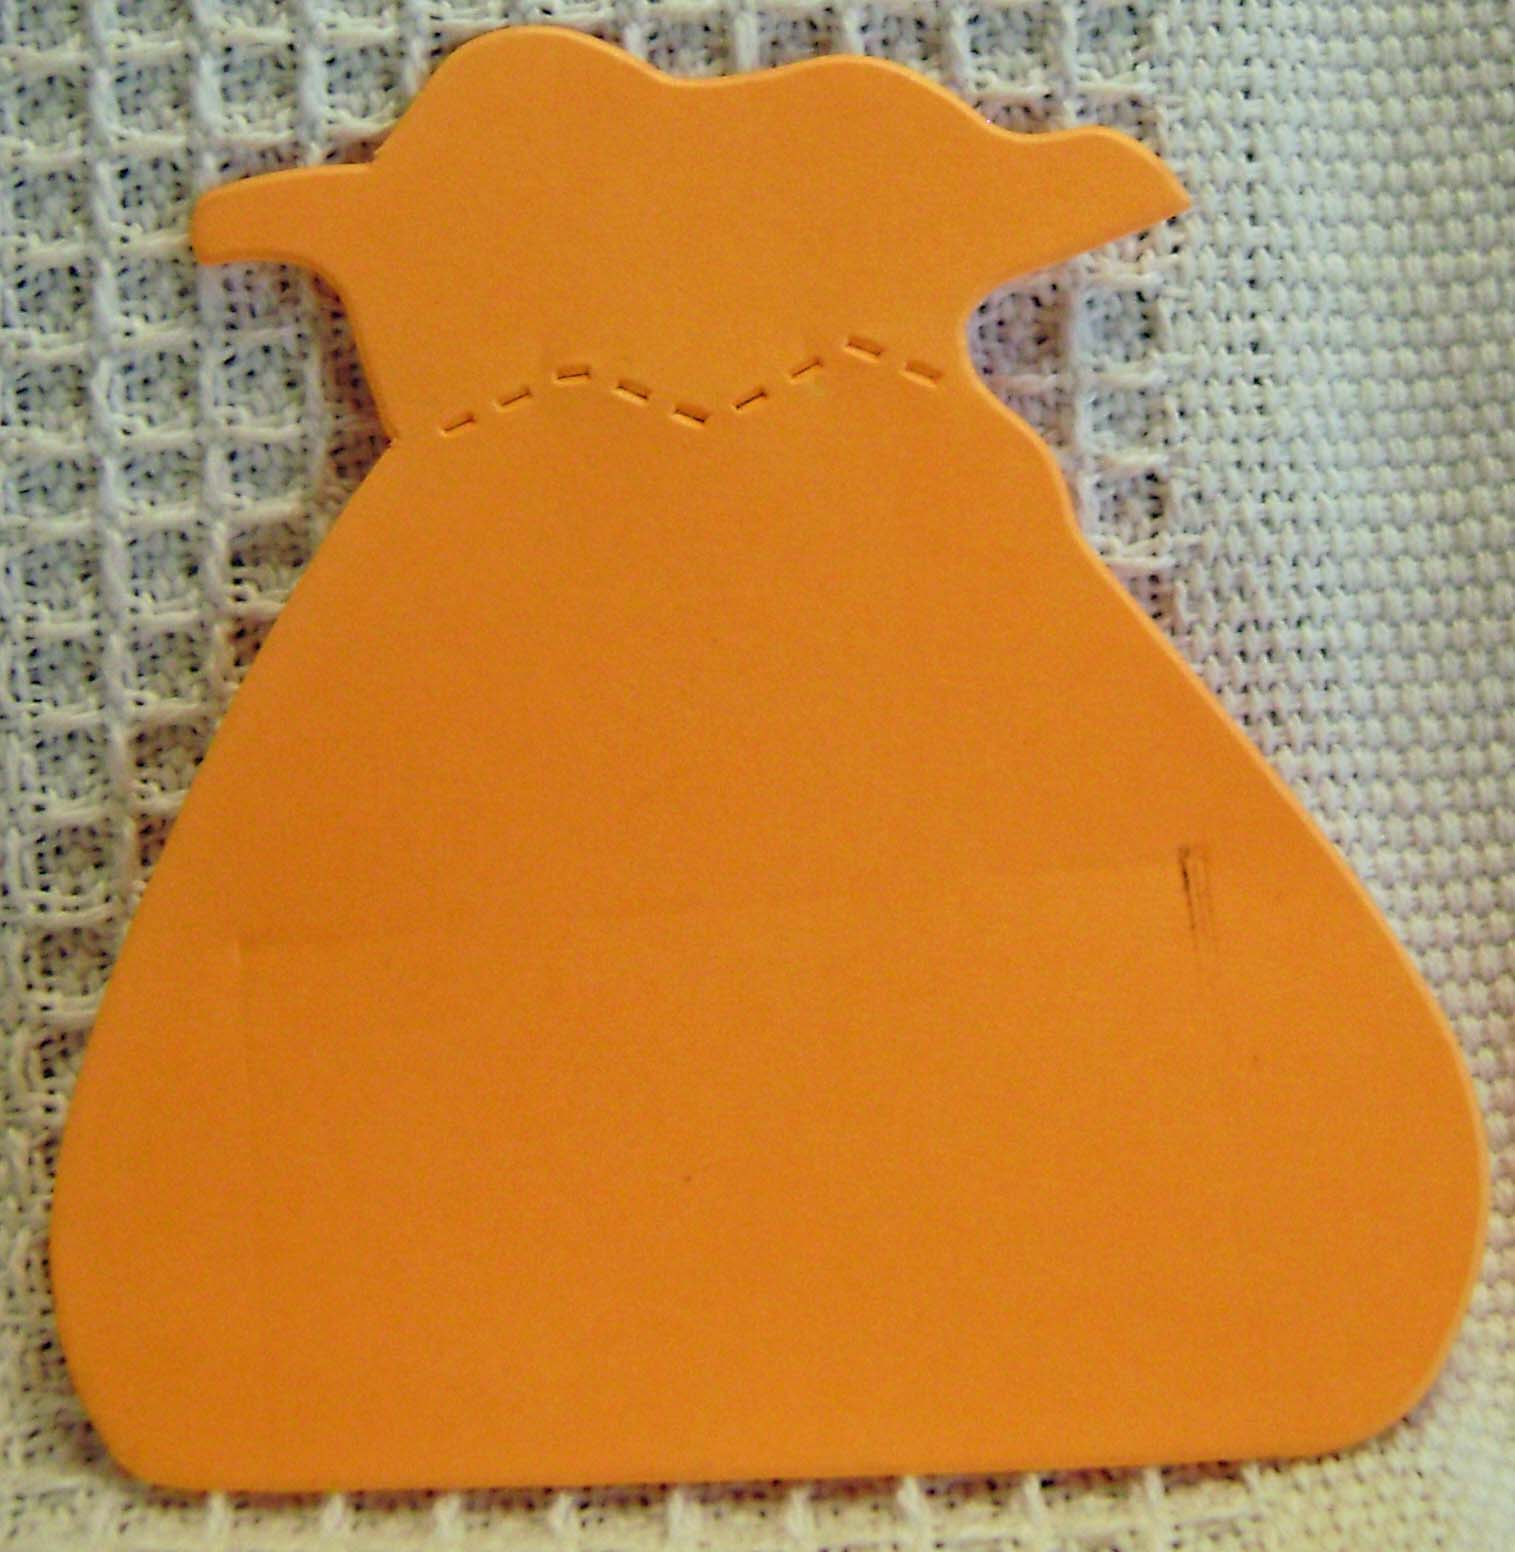
My
next challenge was what to do with this plain non-descript sack die cut?
What to do? I could
have inked it and added some ribbon, but still it would have looked pretty
plain. So I decided to revamp the old
shaker box idea, remember that? Shaker
boxes were more popular several years ago, so why not kill two birds with one
candy sack?
I cut out a square in the middle of the die cut, and then I
added a square piece of plastic I got from an embellishment package. Next I added some beads to put into the
square to make the beads look like candy.
It was that easy to make a shaker
box!
I also “prepare” my embellishments by layering them to a piece
of cardstock or pattern paper. By doing
this I create a sort of “border” so that I can glue down the ready-made
embellishment to a layout or album.
Voila! I am ready for at least a two page layout, and I feel good about
the fact that I used some of my old stash!
Thursday, September 15, 2011
Scrapstreet is having their 6 year Anniversary!!
Scrapstreet has been around for 6 years and they have published over 10,000 scrappy entries. Go on over to Strapstreet - they are giving away some blog candy to celebrate!! Also take a look at their call list - your layout, card or altered item may be the 10,001 to be published!!
Monday, September 05, 2011
Exciting News!!
I have been accepted as a ScrapStreet staff writer!! I am so excited about this new adventure, I get to scrap then write about, how cool is that?
Scrapstreet is a really cool e-zine that has been around for 5 years and publishes an issue every month. The magazine is loaded with ideas and tips on scrapbooking layouts, altered projects and cards. There is also a Digi magazine called GingerScrap Street if you are interested in digital scrapbooking.
I have my first assignment and will be busy coming up with ideas for the October Issue. You must check this magazine out - there are some really talented scrappers (and writers) on staff. I also want to send a shout out to the other new staff writers. Whoot Whoot!!
Subscribe to:
Posts (Atom)


http://scrapstreet.com/ss11/10ooo/contents.htm